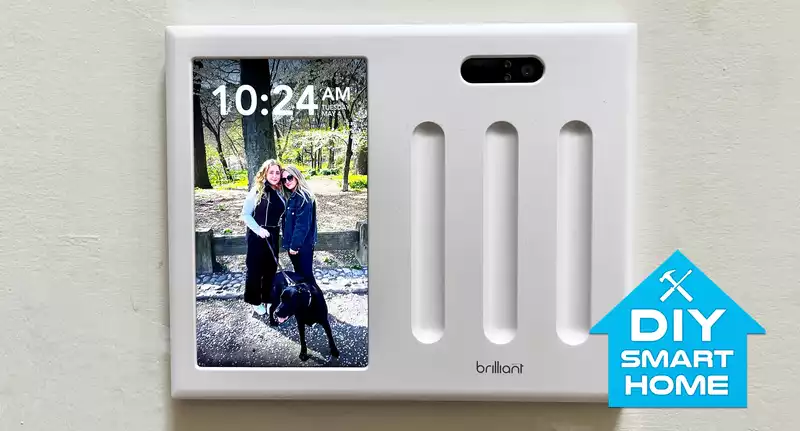
I knew that a brilliant smart home system would be the centerpiece of my entire DIY smart home a few months ago when I decided to use smart switches instead of smart bulbs. However, I needed to replace my trusty 3-gang light switch with a high-tech touchscreen panel.
In a review of the Brilliant smart home controller, I read that disconnecting the wires from the regular switches to accommodate the smart panel could be more complicated than the instruction manual said. It's not that I wasn't willing to solve the little problem, it's just that I didn't want to break the existing wiring setup that powers all the major overhead lights in my house.
Now, when the folks at Brilliant wanted to know if the aptly named Smart Control Panel would work in my house, I called an electrician to show me what a neutral wire is and what to do if there is no neutral wire. The electrician also made sure we were not left in the dark, even though he had to rewire our space to accommodate the new light fixtures and the wall we were tearing down.
The electrician offered to help with smart switches as well, but I felt inclined to embrace the DIY nature of this series. Besides, most of the better smart light switches advertise easy, guided installation. Many companies explicitly state that no advanced electrical knowledge is required to power up their products.
Nevertheless, if you don't know how to understand the wiring behind a wall, always consult an electrician. You may joke about electrocution, but it is never funny. Contact with live electrical wires can lead to serious injury. With this in mind, consider what can happen if you install a Brilliant smart home system yourself and whether it was worth it in the end.
Brilliant includes an installation manual in the box. However, in my opinion, the manual oversimplifies the process, making it a one-step process from turning off the breaker to getting the smart home panel working. That's a bit of an exaggeration, but my point is this: you will likely need additional guidance to get a brilliant smart home system to work.
I turned to YouTube for help, but most installation videos did not show how to install the 3-switch Brilliant panel I use. Brilliant panels come in 1-switch, 2-switch, 3-switch, and 4-switch configurations, and while the setup procedure is generally the same for each version, it would have been beneficial to see the specific version I use installed.
Nevertheless, I went ahead and disassembled the existing switches and took pictures for reference in case I needed to backtrack. I was able to identify the white neutral wire and the copper ground wire, but then things got confusing: the 3-switch panel requires three load wires and three line wires, and according to the accompanying diagram, the unit can automatically detect which is which.
However, when I placed all the wires in the ports that seemed appropriate, the panel would not turn on. Disappointed and waiting for the sun to set, I decided to reinstall the single-pole switch and try the brilliant again another time. I also turned the breaker back on.
Needing to do something before nightfall, I ran to the local hardware store and purchased a continuity tester. As it turned out, the line and load wires were mixed up, all black. Then I tried again to install the brilliant panel, and it powered up and started playing Hallelujah. Actually it did not, but I swore I heard the song of success playing in my head.
It took nearly two hours, but I now have a fully functioning Brilliant Smart Home system mounted on the wall near my front door. Consisting of a color touchscreen, three physical dimmers, and a camera, this panel replaced my standard light switch.
In addition to checking the time and climate, the touchscreen can control all compatible smart home products, including TP-Link smart plugs and Schlage smart locks. It also works with Honeywell Home's inexpensive smart thermostat. The dimmer controls three sets of light fixtures, and the camera can stop by the front door or intercom with anyone in the house from a smart phone. I use it to check on my dog.
When I am home, the camera can be hidden with a physical shutter. My family can also control our device dashboard with the Brilliant app, but access to our account required a two-factor authentication code that is sent to my email. Adding layers of privacy and security was critical in mapping out the right smart home products for our space.
There is much more that the Brilliant Smart Home System can do, but it has already proven its worth. If you are looking for a way to save thousands of dollars when designing your smart home, this panel can replace many of the other products you would buy individually. The 3-gang panel I used costs $399, but you can get a single switch panel for $299.
Yes, it was absolutely worth the headache of installation. As I continue to embrace the new intelligence of our home, I'm sure I'll find more uses for the Brilliant Smart Home System.
For more gadget recommendations, be sure to check out my guide to the best smart home devices (and the best inexpensive smart home devices). If there's anything you'd like to see covered on Connected Spaces, please email me at [email protected] or leave a comment below.
.


Comments